BlitzUnit is currently available as a zipped binary release a stand alone installer.
Extract the contents of the BlitzUnit zip to a directory.
Copy "BlitzUnit.decls" to your Blitz3D/BlitzPlus userlibs directory.
Copy the contents of "Blitz Docs" to your Blitz3D/BlitzPlus function documentation directory. This is usually something like "BlitzPlus\help\commands\2d_commands".
All done! Run BlitzUnit.exe to configure it, and try it on some of the files in the "examples" folder.
Once the software has been installed and configured, you can start creating and running unit tests. See Creating Unit Tests for more detailed information on creating unit tests, including a full example.
BlitzUnit can be run in two modes: console and GUI mode.

The windowed mode of BlitzUnit is the quickest and easiest way to begin running unit tests. Start BlitzUnit to be presented with the main window. From here you can create new projects (a collection of unit test files) and run them interactively.
The main form is divided into 4 tabs:
Test Hierarchy -- A view of the project divided into fixtures and unit tests.
Project View -- A file view of the project, divided into files and their tests.
Raw Output -- Simple output of unit test execution results.
Log Output -- Pretty view of the unit test output.
Each test has an icon to show its status:
|
|
|
|
To find compilation errors, use the Raw Output tab to view the complete log.
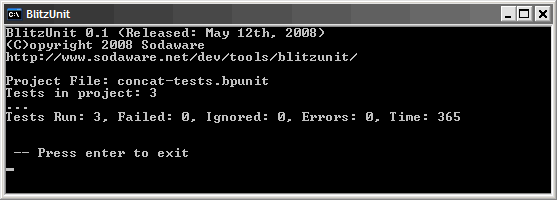
BlitzUnit can also be run as a console application by passing "--console" when running it. You will also need to specify a test file or test project to load and execute.
Example: "BlitzUnit --console /project my-project.bunit"
This will run BlitzUnit in console mode and execute all tests in the project "my-project.bunit".
Each test will return one of the following characters:
| . -- The test has passed |
| F -- The test failed |
| e -- The test file contains errors |
Any errors will be displayed once all tests have completed.
BlitzUnit can either be run as a an interactive GUI or as a console based application.
Command Line Switches
- --console
Run BlitzUnit in console mode. Requires either /project or /input to be set.
- --silent or -s
Run BlitzUnit in silent mode. Supresses all output (console mode only).
- --auto or -a
If BlitzUnit is running in console mode, will automatically close the app when finished.
- --stdout
Writes messages to stdout instead of a Blitz console. Useful when integrating BlitzUnit into other applications.
Command Line Parameters
- /p or /project
The name of the project file to run.
- /i or /input
The name of a single test file to run.
- /l or /log-file
-
If set, will output a log file after tests have been run to the file specified.
Example: BlitzUnit /log-file "My Log File.txt".
- /f or /log-format
-
If set, will use the specified format when creating a log file. The default format is XML. Acceptable values are "txt" or "xml"
Example: BlitzUnit /log-format xml or BlitzUnit /log-format txt
- /x or /xsl-name
-
If set, will use the specified XSL stylesheet when creating an XML log file. Either use the name of the stylesheet from the "Styles" directory, such as "basic-style" to use an absolute link, or add the ".xsl" extension for a relative link.
For example, "/x basic-style" will use "file:///path/to/basic-style.xsl" as the XSL location. Using "/x basic-style.xsl" will use "basic-style.xsl" as the XSL location.
If you're intending to put your logs on the web or share them across different computers, you'll probably want to use relative paths. Just remember to copy the stylesheet and supporting files too.